2. SAP Work Zone : Overview - Content Manager
페이지 정보
본문
목차
| 1. SAP Work Zone : Overview - 개념 및 구성 요소 |
| 2. SAP Work Zone : Overview - Content Manager |
| 3. SAP Work Zone : Area 와 역할 |
| 4. SAP Work Zone : 초기 구성 방법 |
| 5. SAP Work Zone : Fiori Apps - SAP GUI for HTML & SAP Web DynPro ABAP |
| 6. SAP Work Zone : Fiori Apps - Cloud Foundry App |
| 7. SAP Work Zone : Fiori Apps - Content Federation |
| 8. SAP Work Zone : UI Integration Cards - SAP system |
| 9. SAP Work Zone : UI Integration Cards - Non-SAP System |
| 10. SAP Work Zone : SAP Workflow Management와 통합 |
앞선 포스팅에서는 SAP Work Zone의 개념과 구성 요소들에 대해 알아봤습니다. 이번 포스팅에서는 Content Manager(콘텐츠 관리자)에 대해 알아보겠습니다.
Content Manager는 My Workspace 혹은 Application 탭 등에 추가할 수 있도록 타일형태로 제공되어지는 앱들을 생성, 수정 및 삭제할 수 있는 관리자 페이지입니다. Content Manager에서 주로 사용하는 기능들에 대해 상세하게 알아보도록 하겠습니다.
1. Content Manager
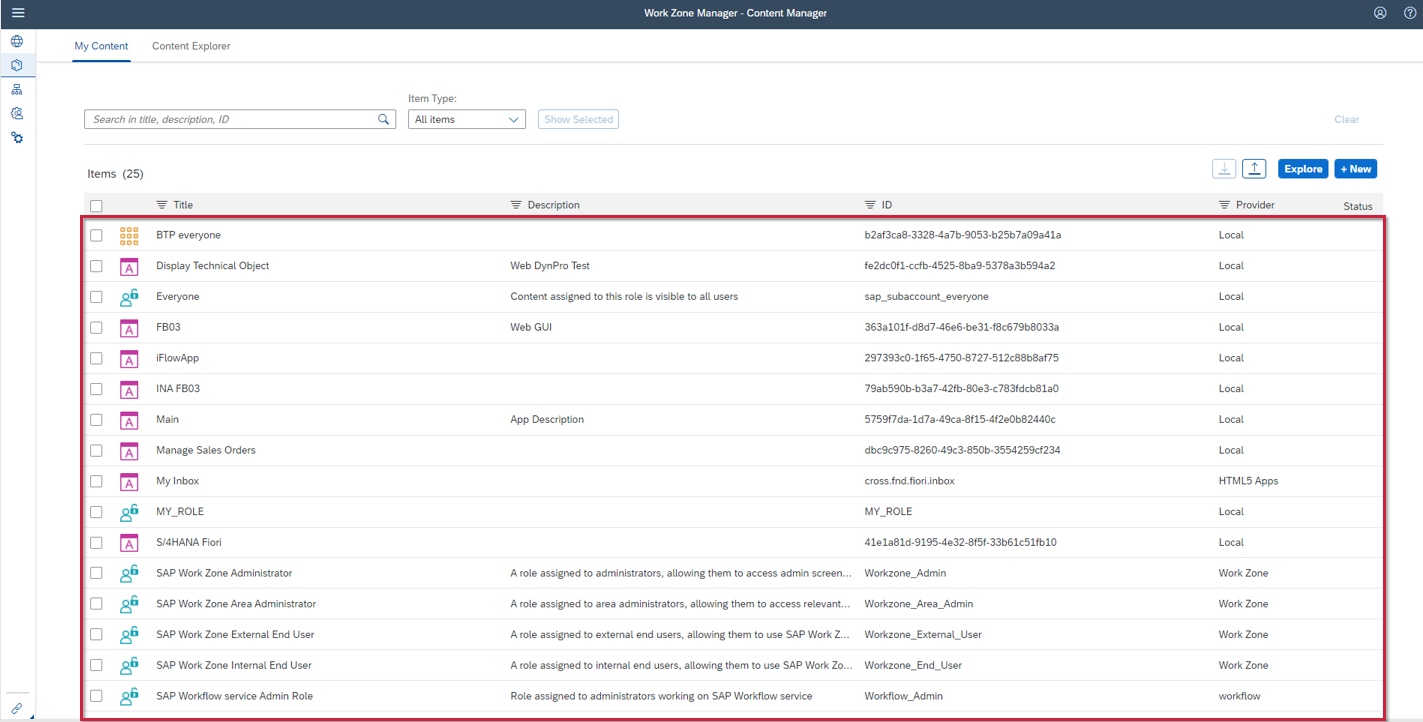
Content Manager로 이동하면 다음과 같은 첫 화면이 보입니다. 이미 생성된 App,Catalog, Group그리고 Role들이 테이블 형태로 보이는 것을 확인할 수 있습니다.
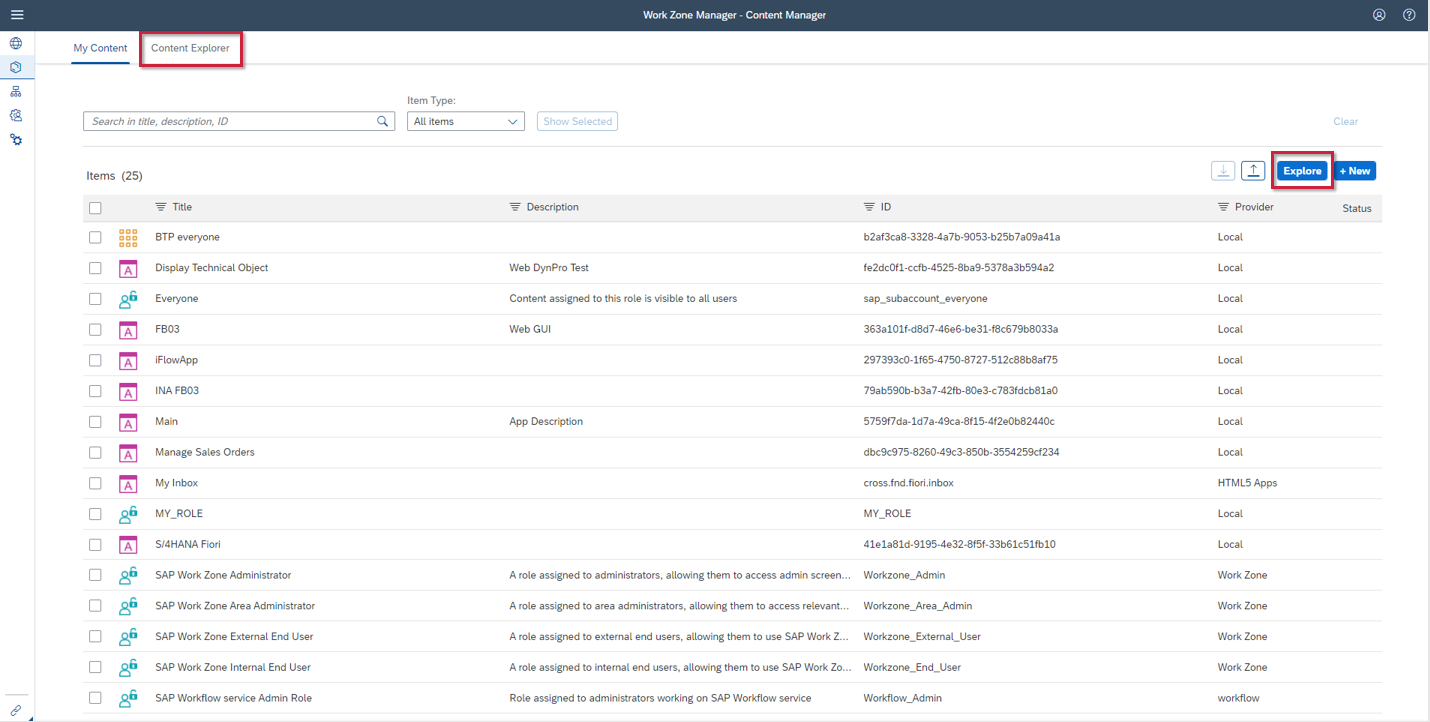
Explore 버튼을 클릭하면 상단에 있는 Content Explorer을 통해 이미 생성되어진 Content Provider를 다음과 같이 확인할 수 있습니다.
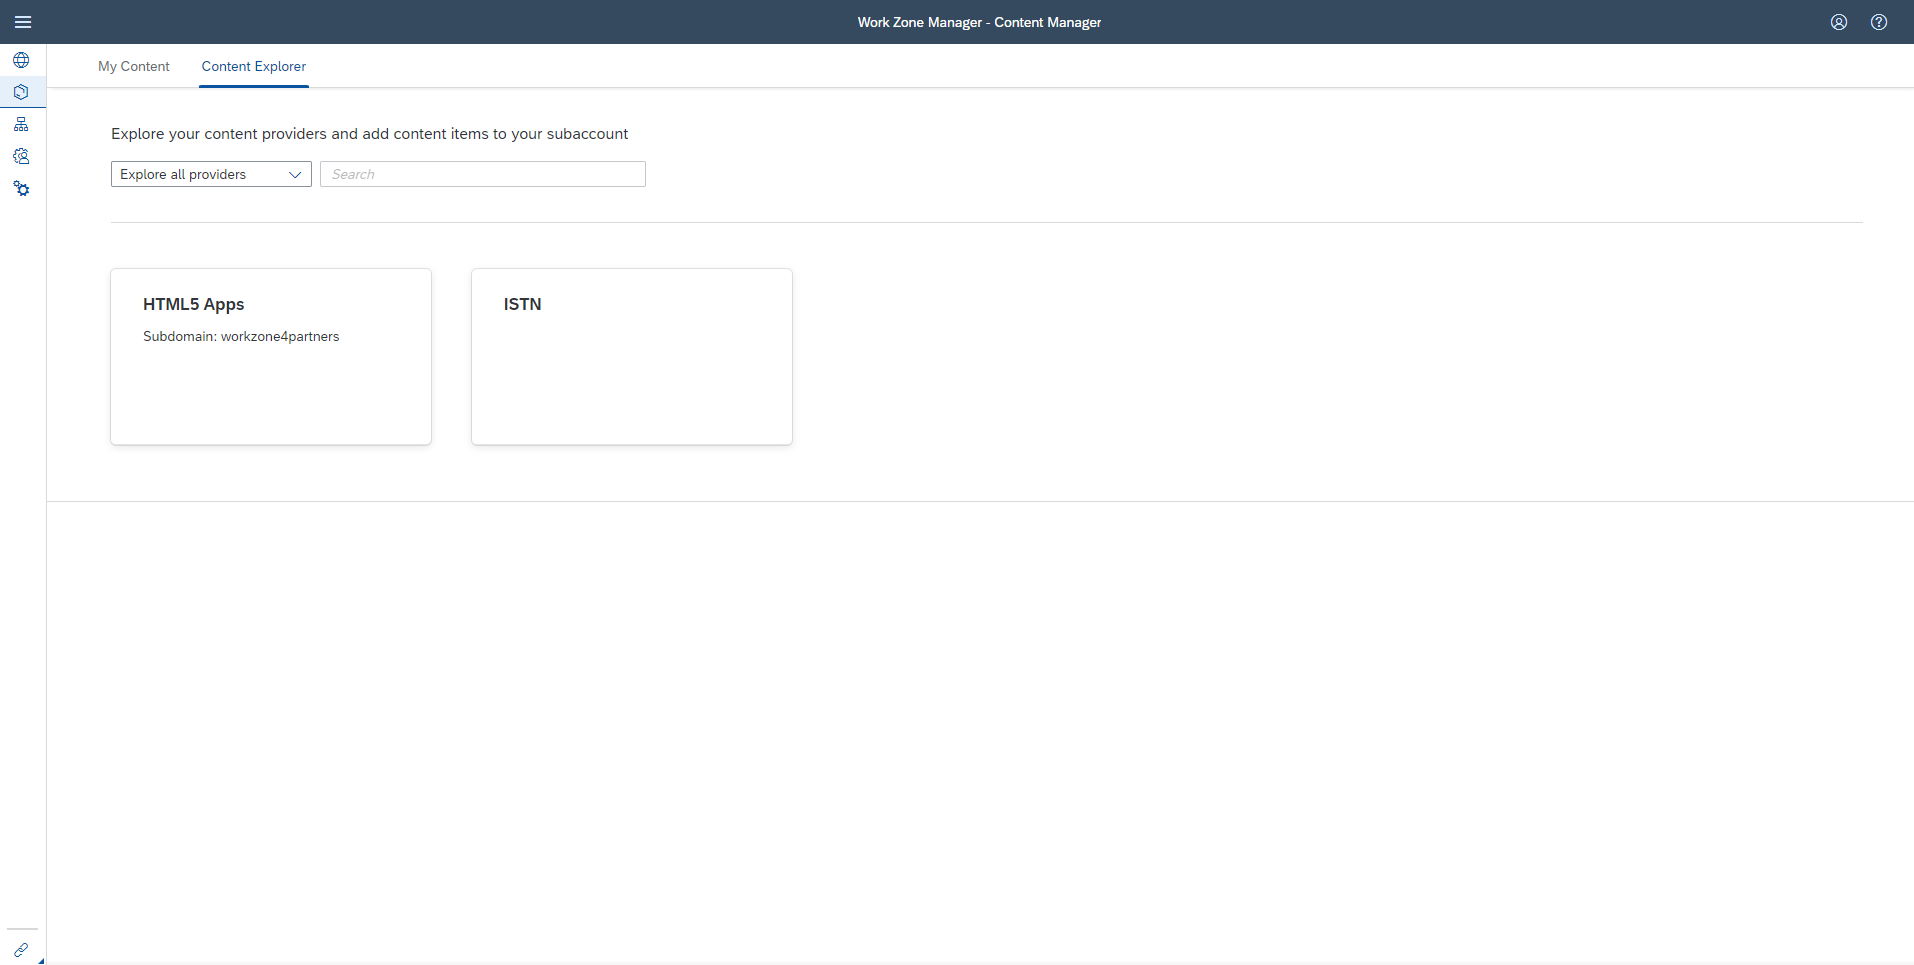
HTML5 Apps는 Content Manager에서 기본으로 갖고 있는 Content Provider로 SAP BTP의 배포된 HTML5 Application들을 탐색할 수 있습니다. 그 외 ISTN과 같은 Content Provider들은 관리자에 의해 생성된 Content Provider입니다.
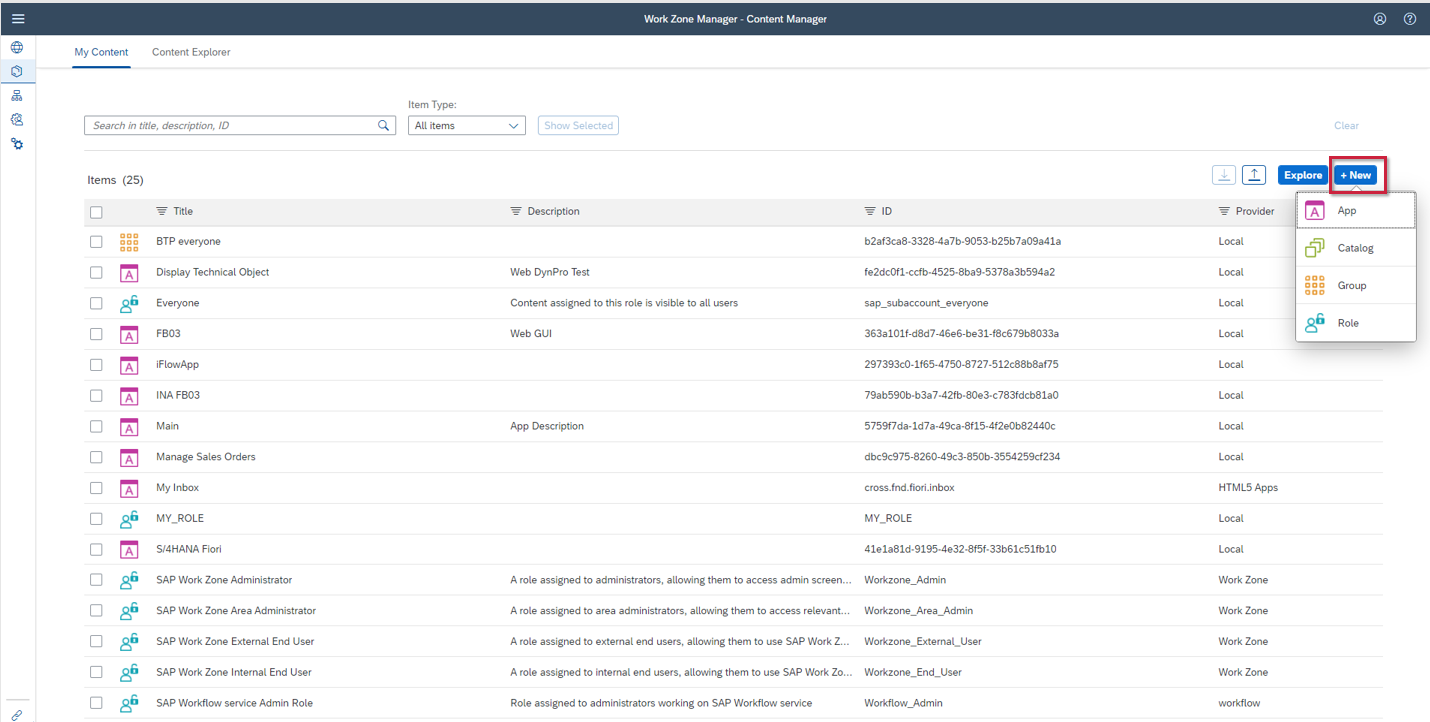
New 버튼을 클릭하면 액션시트를 통해 앱, 카탈로그, 그룹 그리고 롤을 생성할 수 있습니다.
2. Work Zone Directory
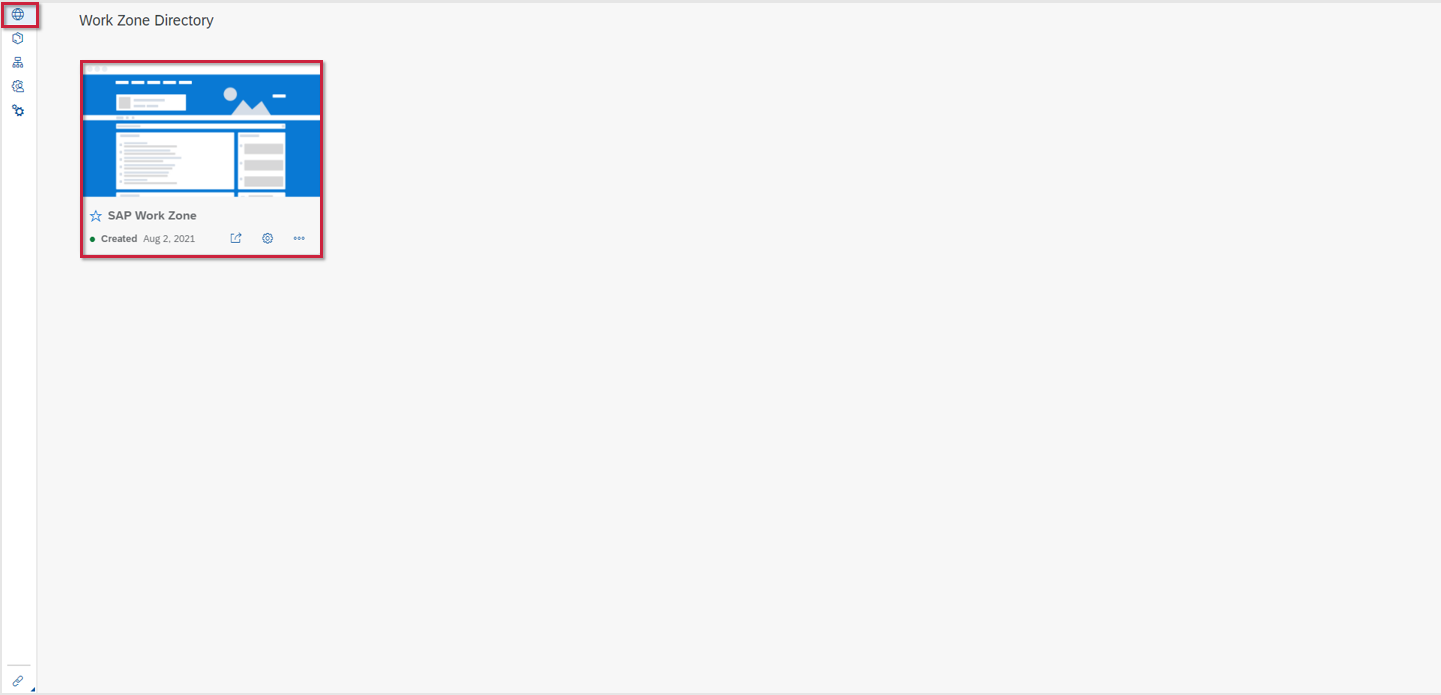
이 화면에서는 하위 계정에 생성된 Work Zone을 실행하고 설정을 관리할 수 있습니다. 설정 버튼을 클릭하여 설정화면을 보도록 하겠습니다.
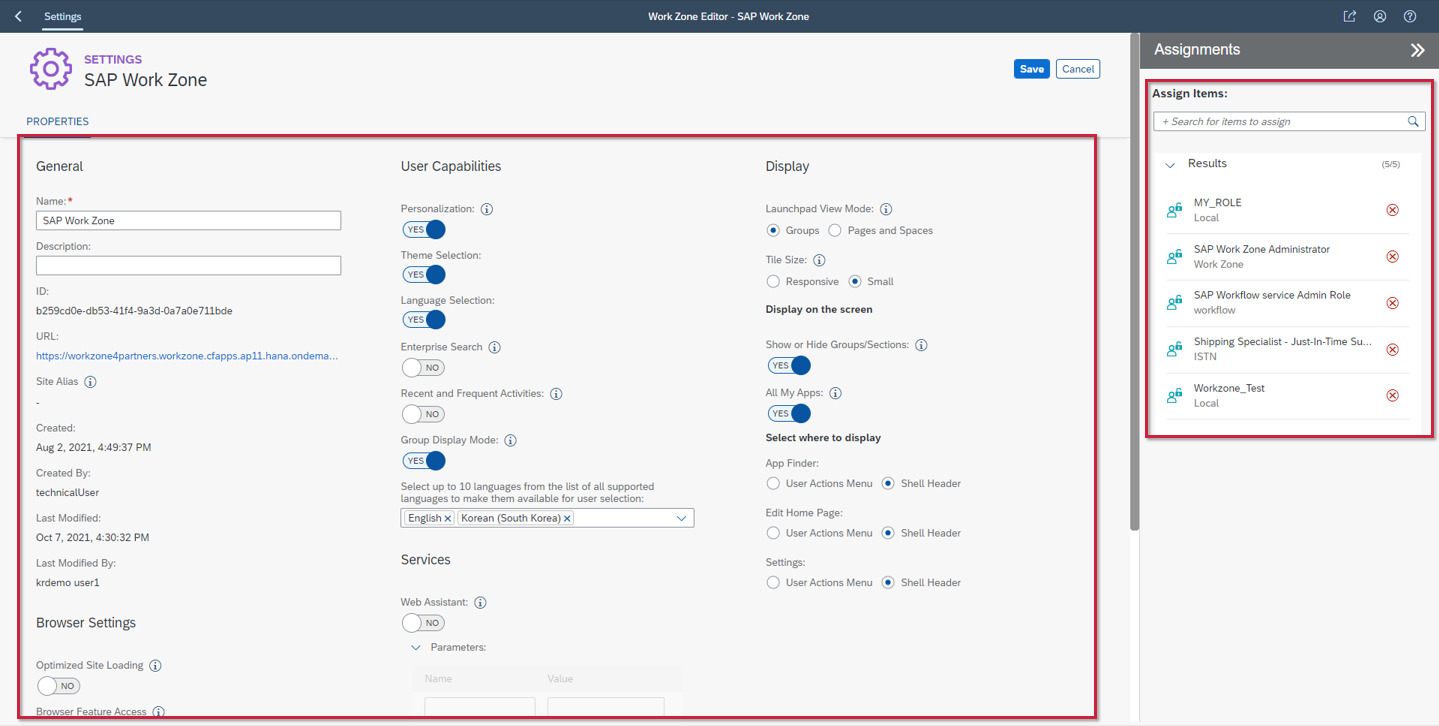
설정 화면에서는 Work Zone의 Properties들을 설정할 수 있습니다. 그리고 우측 Assignments에서는 해당 Work Zone에 부여할 Role을 추가하거나 삭제하는 것을 통해 Role에 따라 Work Zone 구성이 가능합니다.
3. Content Provider
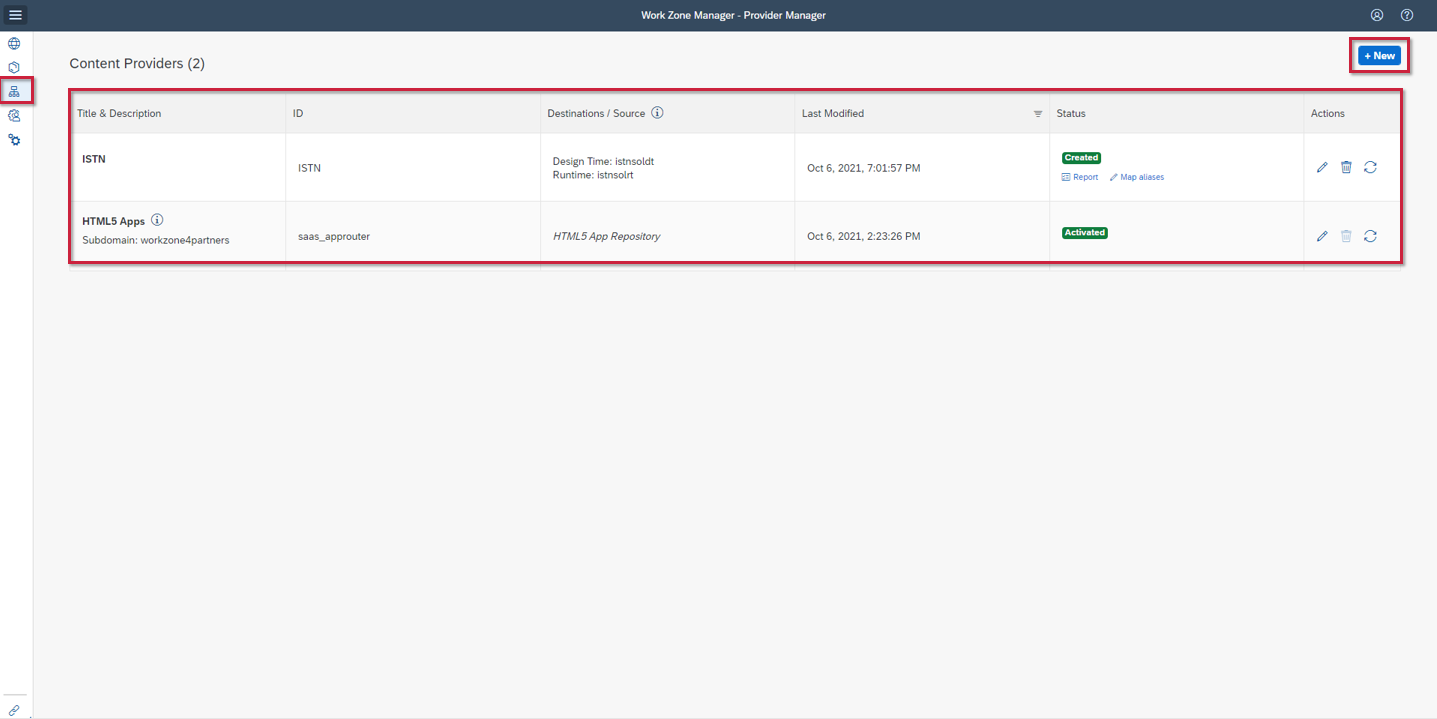
다음은 Content Provider 화면입니다. Content Provider들은 Work Zone에 통합할 수 있는 비즈니스 콘텐츠들을 노출시킬 수 있습니다.
Content Manager 화면에서 콘텐츠들을 탐색할 수 있는 Content Provider를 생성하거나 삭제할 수 있습니다. 이미 존재하는 Content Provider들을 테이블 형태로 보여주고 있고 Actions 필드에 있는 기능들을 통해 수정, 삭제 그리고 업데이트를 할 수 있습니다.
New 버튼을 클릭하면 Content Provider를 새롭게 생성할 수 있습니다. 이에 관한 내용은 추후에 포스팅하도록 하겠습니다.
4. 마치며..
Content Manager에 담긴 기능을 살펴보았습니다. Content Provider 생성 등 심화된 기능 탐색은 앞으로의 포스팅에서 다루도록 하겠습니다. 다음 포스팅은 SAP Work Zone의 Area와 역할에 대해 알아보도록 하겠습니다.
- 이전글3. SAP Work Zone : Overview - Area와 역할 21.10.14
- 다음글1. SAP Work Zone : Overview - 개념 및 구성 요소 21.10.14
댓글목록
